Blog # 14 The Cannibal In Your Back Yard
Our goal is to always have fun while doing bonsai, hence our company slogan You know you are a bonsai freak when you ...
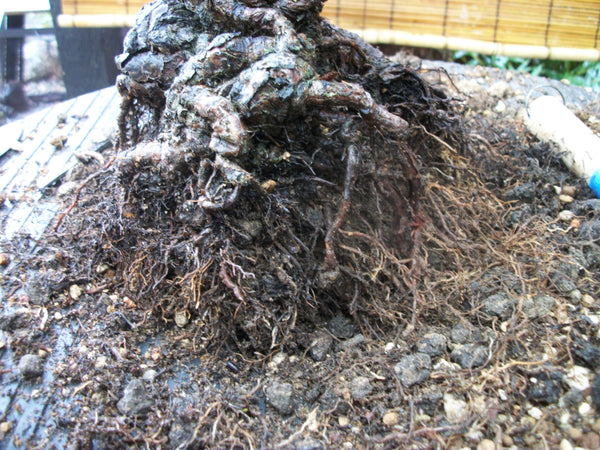
That's right you heard it here first!! You see after maybe a year your deciduous plants might be ok, maybe even two years and that is pushing it. If you are fertilizing and watering and re-potting regularly your little bonsai will be extremely happy. If not, after a while the only nutrients your plant may get is to eat itself. Where else would it get its nutrients unless it began to eat the dead roots that died and were taken over by big ass ropey root cannibals! So maybe that is a little farfetched...then again, if someone does not change the soil regularly and fertilize exactly what is the plant eating and breathing after a few years? Please stop by my facebook group https://www.facebook.com/groups/bonsaifreak/
It's re-potting season...actually in California, one could probably have gotten away with re-potting since December. This has been an overly warm year and in the Bay area we have only had one cold spell that I can remember, and that was only one or two mornings. So exactly why do we re-pot??
A. It helps keep tree more compact
B. If we do not re-pot the roots will fill the bonsai pot and limit water and air flow
C. Re-potting allows us to cleans roots from plugged drain holes
D. Plant will be become cannibal if we do not
E. We must re-pot, trim roots and remove from nursery soil and put in bonsai mix
F. Re-potting rejuvenates the bonsai plant
G. It allows us to inspect the roots of our plants for insects, disease and weeds
Has anyone ever taken the time to teach you step by step re-potting. It was not until I went to the intensive classes that Sensei Boon teaches that I received a step by step lesson on re-potting. Not only a step by step but the reasons why and exactly how to do it. Without being redundant I plan on covering some of that in this blog. If you are a re-potting expert than this is the part where you go re-pot another plant. If not hang on, go put on your favorite music and envision the steps as I go through them. OK just go grab a deciduous tree that needs re-potting and follow along.
Since I know some people are new to bonsai that are reading this, I would like to start with the tools and material you will need.
A. Bonsai Wire Cutters. B. Cycle C. Mesh to cover the drainage holes. D. Wire, size 1.5 or 2 aluminum E. Bonsai Pliers F. Rake. G. Root cutters. H. Bent tweezers. I. Water J. Ronandersonbonsai drainage (a little plug there). K. Ronandersonbonsai Premium mix (just in case you missed the first plug!) L. Bonsai or growing pot. M. Chop sticks N. Broom. O. Tamper P. Sphagnum moss screened
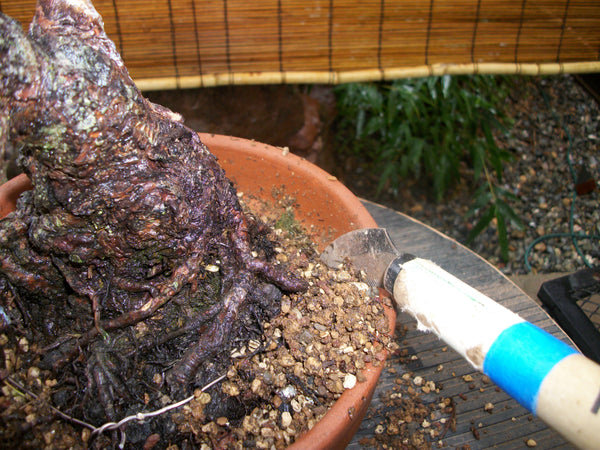
Paragraph # 1. I believe if you asked a few bonsai professionals what is their favorite tool for re-potting you would get many different answers. What's my favorite you ask? The sickle...to me one of the most important and least used tools. Have you ever seen a person struggling with a bonsai trying to get it out of a bonsai pot? This does not happen when you use the sickle, in fact when done right you can push it out with one finger.
Ok so here is the straight down and dirty steps for re-potting that anyone can use…
Paragraph # 2. You will want to tilt your pot until you can see the bottom where all the wires holding everything in, cut them clean off so that nothing will hold the plant in when you begin to remove your bonsai. Next you will set your bonsai upright and using your sickle, clean out all soil within about a half inch to a quarter inch from the side of the pot on three side of the pot all the way down to the bottom of the pot. If you did this correctly, you should be able to with one finger push the bonsai right toward the back of the pot and the front should pop free and be easily lifted right out of the pot. If this is a nursery plant you are working on in a nursery pot read the next paragraph if not skip to paragraph #4.


Paragraph #3 If you are starting with nursery stock in a black pot of death, use your sickle to clean out as much nursery soil as you can all the way around the pot edges. If you have a shallower pot this may be all you need to get the plant out of the black plastic pot. If you still have any challenges getting your plant out, lay it on a table and tap all the way around until the plant is loose and can be removed. Begin removing soil on top to find the widest part of your nebari. Once you find the nebari you like, go ahead and figure out half of the soil and roots and then cut that in half.
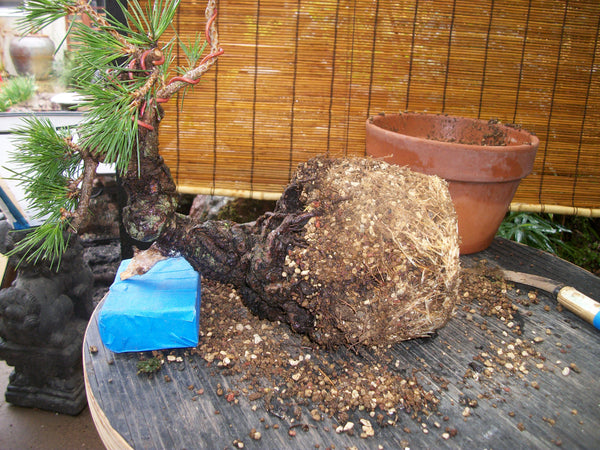
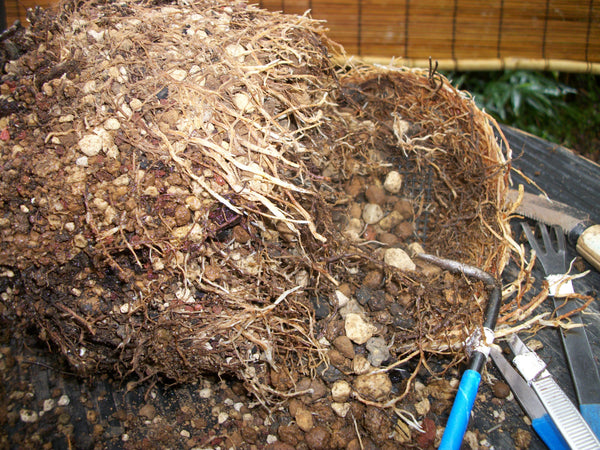
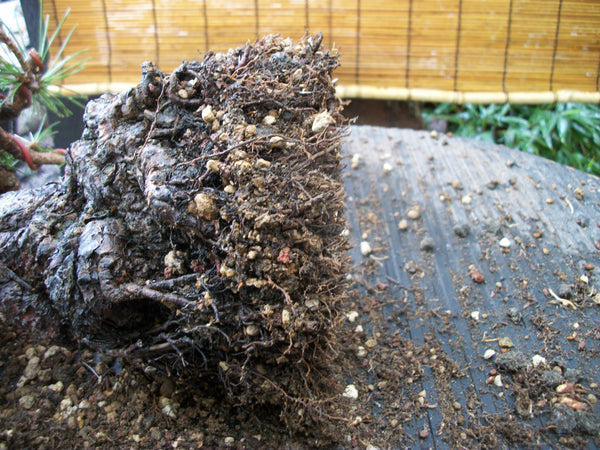
Paragraph #4 From this point forward pretty much nursery stock and Bonsai in training will be treated almost same as far as re-potting goes. Lay the plant sideways and use the rake to remove last year’s bonsai mix, taking care in removing all downward growing ropy thick fat unwanted roots, with both a root cutter and with finer scissors to remove last year or two year old roots. You should cut the bottom completely flat. Your plant should be able to stand up on its own now when placed on the table, if not the plant will in time as the fibrous roots take hold. Spray your roots to keep moist and remember to not let your roots dry out.
Paragraph #5 Time to go get your pot ready, if this is a growing pot use what works in your area, terracotta, Anderson flats, plastic bonsai pot or old bonsai pot etc. If your pot has holes, cover them with mesh and tie the mesh in (some plastic bonsai starter pots have pre-made drainage holes that do not require mesh. Next run two different strands of wire through the mesh in the bottom of the pot to tie the front and back of your plant in place when you get to that point. Something else you may want to do is thoroughly wash your pot inside and out, just to make sure you’re not transferring some unwanted foreign bodies to newly potted plant.
Paragragh #6 Back to your tree! For deciduous trees remove all soil by using your bent tweezers combing out and slowly turning your plant until all soil is gone. Then go wash you plant to ensure no soil...I mean nothing should be left except clean roots. I usually say do this on a healthy tree, but the tree may be unhealthy due to poor soil so I would do the same on an unhealthy tree to give it a fresh start. If its unhealthy dying and not looking healthy you don’t want it in your yard anyway!!

Paragragh # 6 If this is a Conifer or a collected plant, please do not bare root, but over the next two or three re-pottings remove all the original soil and replace it with good bonsai mix, remove less on a collected plant. Now it’s time to take your plant and place it in your pot to see how much drainage and bonsai mix you need to make sure your Bonsai nebari is level with the top of the pot. Place your drainage in the bottom of the pot, and then place a little bonsai mix on top of your drainage. Next place your bonsai on top of the mix and lightly twist in back and forth in the pot to seat it firmly. Then tie your bonsai in place by tying it in front and back to hold it in place. Add bonsai mix to the top of the pot and begin working it in place with chop sticks. When you are done with this step, tap the side of the pot firmly and watch you bonsai mix seat itself. By the time you are finished you will have pushed the mix down about a half to ¾ of an inch. Don’t overly do this step or the drainage will be pushed to the top and the good mix pushed to the bottom. Add more bonsai mix to bring the level of the mix within an 8th of an inch below the top of the pot. Next use your broom to even everything out and if needed remove any excess. Use your tamper to firmly tap the soil completely flat. Next add shredded sphagnum moss and then water until the pot runs clear.

Your bonsai is either ready for the bench to grow or ready for the show…this is another reason we leave a 8th to a quarter inch gap at the top. If you are going to show your bonsai all you need to do is add moss…well there a little more to it than that but that’s another blog!!
Stop the Myth!!! Put your tree in the sun after re-potting…Morning sun afternoon shade. Heat is what helps your tree recover from re-potting and the sun will help your bonsai begin to push fibrous roots. One may want to wait for about 6 weeks before you begin to fertilize again.
I hope to see you at our next show in Santa Cruz. It will be held March 22nd, and March 23rd, 2014 at the Museum of Art, 705 Front street Santa Cruz • CA • 95060